* Some articles may contain affiliate links for researched products. There is no extra cost to you and it helps pay for boring stuff like website hosting and plugins.

Oh boy! Pinterest is keeping us ON OUR TOES. Pinterest has been implementing some pretty serious changes this year to the way the platform works (aka, their algorithm), changes that are here to stay. In a nutshell, the focus is now on quality VS. quantity and that changes quite a few things when it comes to using it to promote your handmade shop and products successfully.
So in this video, we are going to:
- Go over those changes and what they mean: how much should you be pinning to respect the new guidelines and avoid being marked as SPAM?
- What on earth are fresh pins exactly and do you really need to focus on them to get results from Pinterest? (spoiler alert: the answer will be yes) and
- How to create a ton of fresh pins for every single one of your handmade products in as little time as possible? I’ll show you how to create over 20 pins in 20 minutes with easy to use tools.
We’ve got some ground to cover so without further ado, let’s dive in! You can watch the video or read the written version below.
In this article, I really want to focus on the main changes that Pinterest has seen lately and how this might affect your Pinterest marketing strategy, as well as give you tips to make sure you can adapt quickly and give Pinterest what Pinterest wants. I am not going to cover the basics of Pinterest: what it is and how it works.
So… if you’re completely NEW to Pinterest, you might find this article a little too advanced, in which case I’d recommend that instead, you read my other blog post called “How to get started using Pinterest for your handmade shop in 9 steps” which is a GREAT introduction to using Pinterest for your handmade business – and then you should totally come back to this one.
Now with that out of the way, let’s get into it!
1. MAIN CHANGES YOU NEED TO KNOW ABOUT
First, let’s talk about those changes.
What’s new and how does it affect your handmade shop Pinterest strategy?
If I had to summarize the changes in one sentence, I’d say that Pinterest now wants us to focus on pinning less, but higher-quality, newer content.
Quality OVER quantity.
What does this mean exactly?
Well, here’s a quick summary of what has changed on Pinterest and what the new best practices are – this is all based on publicly available information that Pinterest has shared with Tailwind, which is an official Pinterest partner and automation tool:
GUIDELINES
- It used to be the more you pin, the better – now… not so much. It’s recommended not to pin more than 50 pins a day (that’s including your own pins and other people pins) as beyond that you risk getting marked as spam by Pinterest.
- Tailwind actually recommends pinning between 15 to 25 pins a day (again, that includes your pins AND other peoples’ pins).
- It’s also recommended to re-pin the same pin to a maximum of 10 boards. It’s more important to re-pin your pins to highly relevant boards, rather than to try and re-pin it to as many boards as possible when they might not be a great fit for it. Remember, each time you pin a pin to a board, you send a signal to Pinterest that “this pin” is about “this topic” – Pinterest looks at the context clues – so the board title, the other pins in the board… and thinks “ok, that’s what this particular pin is about”. So here again, quality over quantity.
- Finally, it’s recommended to have an interval of 2 days between boards minimum. So, if you pin a pin to a board on Monday, you should wait until at least Wednesday to pin it to another board.
SO…
- Max 50 pins a day
- Best to sit between 15 and 25
- No more than 10 boards per pin
- A minimum 2-day interval between boards
Now, remember not to take this as an exact formula, these are guidelines to make sure you are not marked as spam that Tailwind has shared, but you don’t need to pin exactly 15 pins to exactly 10 boards with an interval of exactly 2 days. You have to adjust these numbers to create your own strategy, which will depend on how many products you have and how many pins you are able to create.
I see a lot of Pinterest users having great success pinning much less than these guidelines suggest and with a longer interval between boards so you want to respect those guidelines, but don’t turn them into a “must pin exactly that many pins” formula.
Given than before these changes, it was normal to pin upwards of 30 pins per day… that’s a LOT less pinning!
Fantastic, that means less work right? Well not really… (sorry!) because instead of pinning a LOT … Pinterest wants you to create more fresh pins as they are now being prioritized in the algorithm, so if you want more people to see your pins… you need to create new, fresh pins.
2. WHAT EXACTLY ARE FRESH PINS?
Ok, so what IS a fresh pin?
A fresh pin is an image or a video that was NEVER pinned to Pinterest before. It does NOT matter what the URL or title or description of the pin is – for as long as the actual Pin image or video has never been pinned to Pinterest before.
As you may know, a “PIN” on Pinterest is made up of a few elements:
- A pin image or video (we’ll call this a GRAPHIC);
- A pin title;
- A pin description;
- A website URL which is where people will be taken to if they click on the pin.
A fresh pin put simply is a brand new GRAPHIC.
So for example:
- Same pin graphic, different description: NOT a fresh pin.
- Same pin graphic, different URLs: NOT a fresh pin.
- Different pin graphic, same URL, title, or description: FRESH PIN.
So… what does it mean? Well, I am sure you’re starting to connect the dots… you might need to pin LESS – but you need to create more of your own pin graphics.
In fact, you want to create as many pin graphics (images or videos) as possible for each of your products.
Not only that… but they also need to be significantly different looking pins.
That’s not important just so Pinterest knows it’s a different image and considers it a “fresh pin,” but most importantly, for Pinterest end-users – AKA your potential shop customers.
Making small changes on a graphic just to trick Pinterest into thinking it’s a new pin is honestly a waste of time and energy because the game here isn’t to WIN OVER PINTEREST, it’s to WIN OVER PINTEREST USERS so they click on your pins and shop your products.
So don’t focus solely on what Pinterest needs to consider your pin as a fresh pin, think in terms of potential shoppers: would they look at 2 of your pins and think that they are the same?
Let’s look at an example.
If I am on Pinterest looking for “dainty turquoise jewelry” and type it in the Pinterest search bar, and I see 3 pins in the results that look like this:
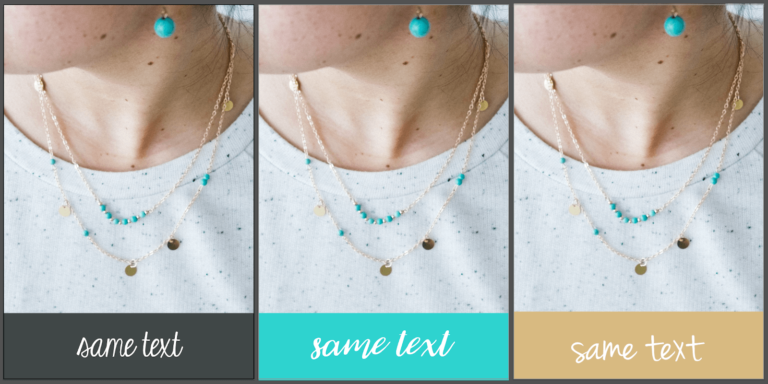
I am not going to be fooled. If I didn’t click on the first one, I am not going to think “oh you know I didn’t like this pin with the dark grey background, but now that I see it with that blue background, oh yes now I am interested in the product.”
Instead, make sure you create pins that are ACTUALLY different, so you can “tempt” potential shoppers with different graphics for the same product, like this:
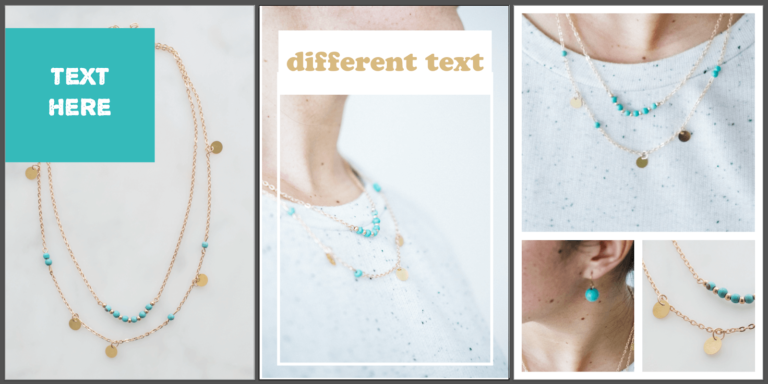
Same product, three very different looking pins.
Having pin graphics that are actually different (not just kinda different) is REALLY important because different designs will appeal to different shoppers.
If you use text on your graphics, having different text will also allow you to cover more than one angle and to target different keywords.
OK, so… this is usually when panic sets in because you’re thinking “that’s too much work, how can I create SO MANY FRESH PINS? What should they even be about?”
Which is a perfect segue to the last part of this video where I want to show you how to create 20+ fresh pins for 1 product in around 20 minutes.
3. HOW TO CREATE FRESH PINS – FAST
Quick disclaimer: the very first time you set this system up for yourself, it won’t take you 20 minutes – it’ll be more like a weekend project – because you’ll be doing the heavy lifting of prepping design templates that you can re-use time and time again after that, but once you’re done – you’ll be able to turn every new product into a LOT of fresh pins, a LOT faster and without having to re-invent the wheel each time.
STEP ONE
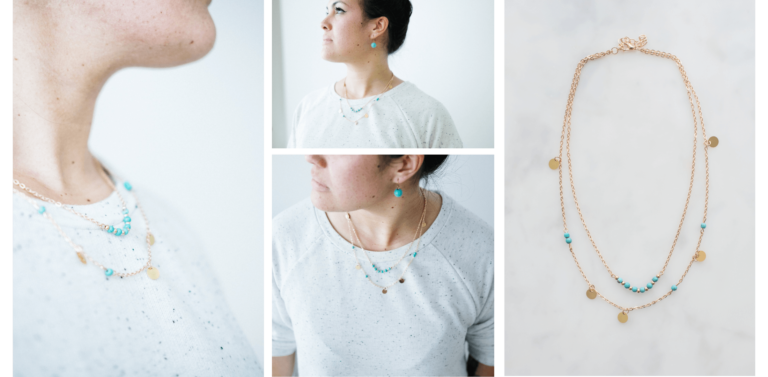
Step one starts when you take pictures of your products. You want to make sure you always, always have a few vertical ones. Don’t just think “square for Instagram or thumbnail” and, right from the start, PLAN to take pictures of your products with Pinterest in mind, ensuring you have images that can be used vertically and – of course, but that’s always true – that you have good quality images too: well lit, bright, in high definition.
For our example, I will be creating pins for THIS product, which is a necklace – for which I have, as you can see, 4 pictures (stock pictures courtesy of Burst):
STEP 2
Create 6 pins templates in the design software of your choice around ONE product image (I recommend Canva which a FREE design software made for people who aren’t designers – in other words, it’s really easy to use!).
What you see on the screen right now are the layouts I came up with:
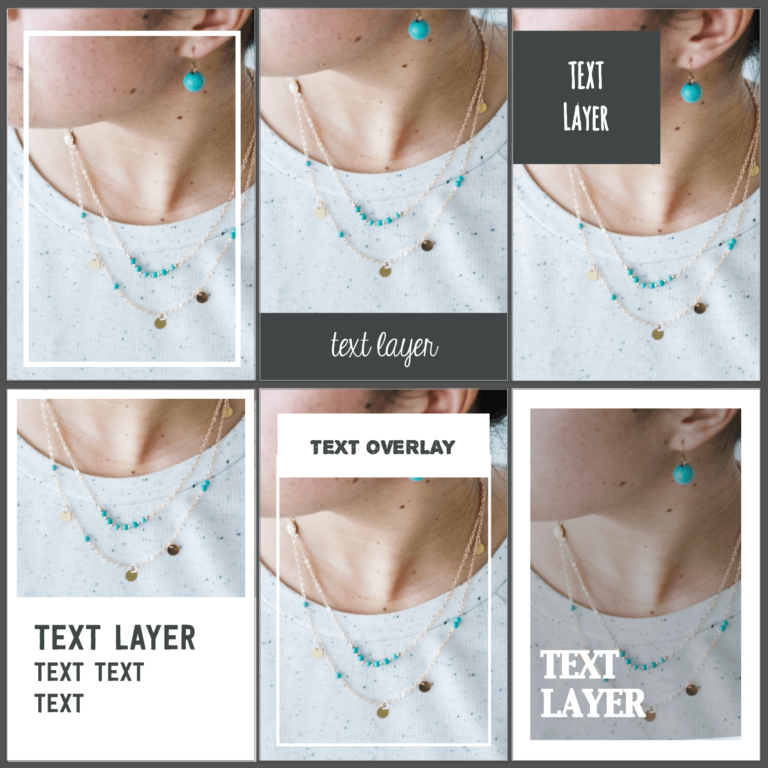
As you can see, I’ve used the same ONE image but presented it in different layouts, so it looks like a completely different graphic.
With that, you’ve already got 6 fresh pins with ONE single image.
STEP 3
Moving on to STEP 3, which is simply to re-use those 6 templates you created, but this time with different images of that same product.
So for example here, same 6 templates, but a different product image gives me 6 more fresh pins:
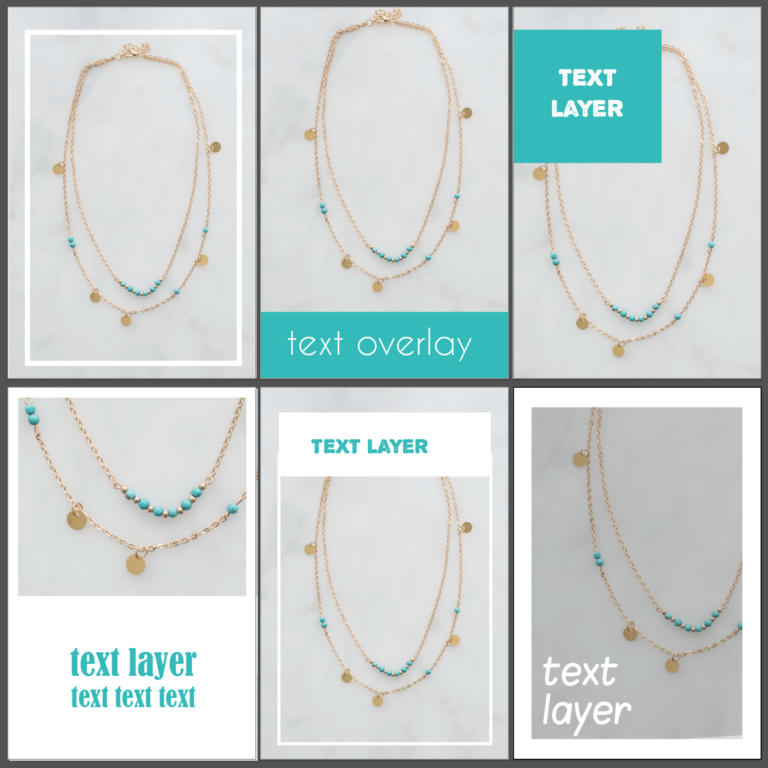
And another 6 with a third image:
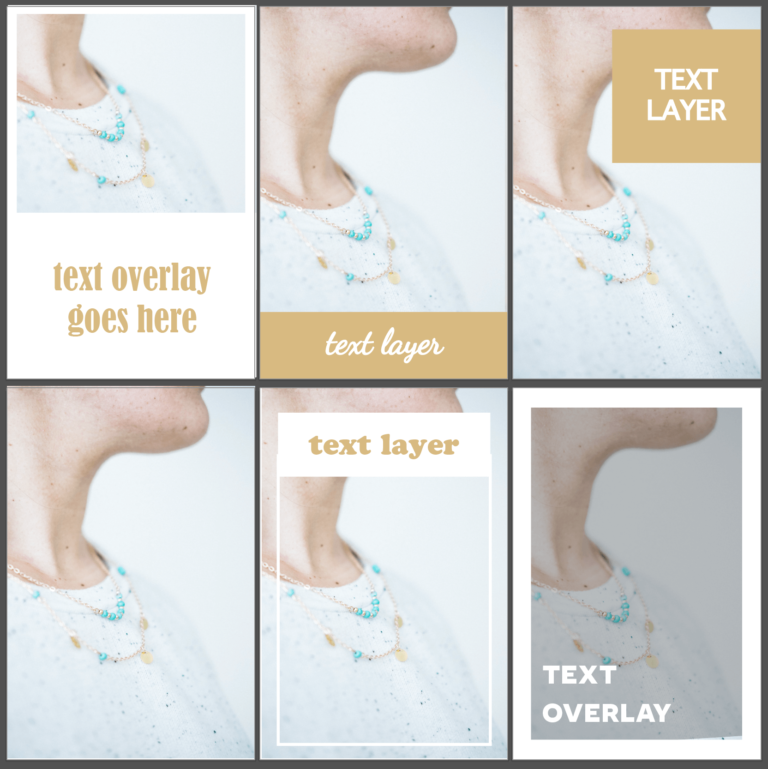
So, if like me in this example you have 3 images of your products (and you really should have at least that, even just for your products listings), that’s already 18 FRESH pins.
You’ll have noticed as well that I “pushed myself” here, and staying within the constraint of my original 6 templates, I didn’t just change my main product image, but also my colors, fonts and the text on my graphics – offering lots of variety for Pinterest shoppers for my one product – which is great.
STEP 4
Create 6 pin template based on a collage of images, so using a combination of different images in the same pin:
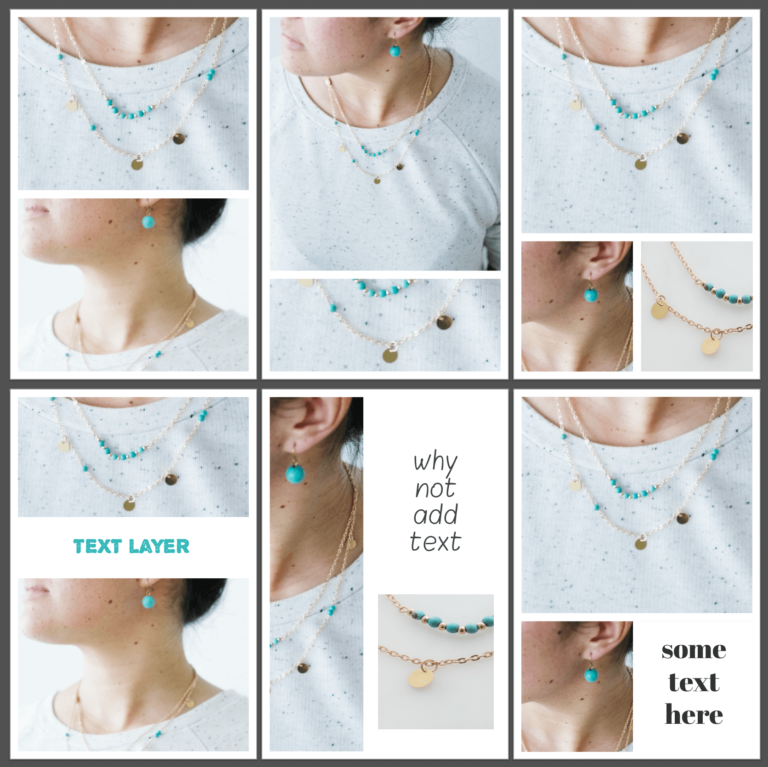
This is what I came up with – and now we’ve got 24 FRESH pins for this ONE product.
STEP 5
Our final step: create 3 pin layouts based on video pins!
Before you think “no way, I don’t have time for videos” and have a heart attack – you CAN create video pins without any actual videos.
Of course, it’s best if you can actually take videos of your products during your photoshoot, but as you can see here, I have used the same STILL IMAGES we’ve used during this entire example to create videos, simply by animating them by zooming in and out on them:
Sadly Canva does not offer this feature yet (although I’d bet they’re working on it so if you’re watching this video in the future, you might want to double-check that), so I’ve done it for FREE using a tool called PIXTELLER.
As much as you might hate the idea of video, video pins are NOT going anywhere – in fact they are hot right now on Pinterest, so I’d STRONGLY suggest you don’t skip this step and start using videos more on Pinterest and actually everywhere – because videos are the new photos!
With that, we now have 27 FRESH PINS for ONE PRODUCT – including video pins – and using only 4 images.
So… as I mentioned, creating the templates initially will take you more than 20 minutes but once that’s done all you need to do to create more fresh pins for other products is swap your product images and quickly change colors and text – no need to re-design a full layout, to think about a completely new pin design each time: the bulk of the work is DONE. This is even something that you could outsource quite easily.
Of course if you want to create even MORE templates, I am not going to stop you!
I just wanted to show you what you can do with 6 basic single image templates, 6 basic collage templates, and 3 basic video templates, but feel free to modify as you see fit, the more the better!
Once you’ve got all your pins designed and ready to add to Pinterest – what should be your next step?
Well… if you ask me, you really should be using Tailwind to schedule out your pins and save yourself a LOT of time. Pinterest is amazing, Pinterest with Tailwind is a serious marketing weapon for your shop.
I have two resources to help you with that if you’re interested in diving deeper: a full course on Pinterest for makers AND on automating your Pinterest marketing with Tailwind that I created with handmade shop owners in mind, so make sure to check them out by clicking the links.
Love you all – and until next time, aurevoir!


